Showing posts with label DIY. Show all posts

Sunday, November 23, 2014

Homemade 6x17 Panoramic Camera using Fujinon 210 mm Lens

I made a panoramic 6x17 120 film camera from black conservation board from Hobby Lobby. It uses a Fujinon 210 mm Lens/shutter. Here are some photos.


Tuesday, November 18, 2014

Film Advance Details for Homemade Camera

Here are some details for the film advance for a 6x17 film camera I made. Thought this might give camera builders some ideas. Works pretty good for me.


The length of the tube can be determined from the rest of the camera design. The advance is pulled up by the knob to remove the roller. I use a bit of dowel for the bottom roller guide. Questions and comments are welcome.

Saturday, September 13, 2014

Gorilla Duct Tape Review

I've been using Gorilla Tape for awhile now. It is the best "duct" tape out. I have used it in making my pinhole cameras. I have used it making masks for my through the lens-finder photos. It is suited for any kind of construction with cardboard or foamcore.Excellent in every way  Tough. Very adhesive - but can be removed without too much trouble. No sticky mess. It costs a little more but it is definitely worth it.


You can find Gorilla Tape at Home Depot. Their website is here.

Wednesday, September 10, 2014

My first attempt at encasing an insect in epoxy

I have long wanted to cast a insect in epoxy. When I found a good cicada specimen recently, I thought I would give it a go. This entry is about the mistakes I made. Hopefully, after reading, when you try you will avoid the same mistakes.

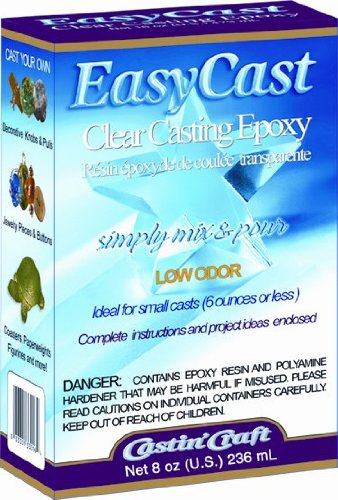
I used EasyCast clear casting resin from here.It is low odor and easy to work with.


I read the instructions (yes, I did) but continued to ignore them. The result was less than spectacular, but a learning experience.

Here is a list of my mistakes in hope that you will do better.

1) Used wrong kind of mold - Polypropylene or polyethylene resin mold are required. I am sure I used poly something, but it was too stiff and the epoxy bonded with it extremely well. I had to cut the piece out of the mold. USE THE RIGHT LIND OF MOLD.

2) Use a mold release - I skipped this as well - Instructions suggest using Castin'Craft Mold Release/Conditioner. USE MOLD RELEASE.

3) Bubbles - I had major bubble on head of the cicada. I believe it is suggested to coat the insect prior to placing in the mold of resin. You can coat the insect with using a small brush. WATCH FOR BUBBLES. COAT THE OBJECT.

4) The legs of my cicada protruded out of the resin. The cicada was very close to the edges. I should have used a bigger mold. USE THE CORRECT SIZE MOLD.

I have learned quite a bit. When the opportunity arises, I will try again. Hopefully without the issues described above.

Monday, September 8, 2014

Add External Flash to Polaroid EE100

I recently purchased a Polaroid EE100 on Ebay. I wanted to add an external flash rather than using flashcubes. I read on the net where you can use the two pins where the flashcube attaches to trigger an external flash. You have to solder wire to these pins and connect the other end to your flash.

Tools Needed

1) Wire strippers
2) Soldering Iron (with pencil tip)
3) Solder
4) Needle nose pliers

Material Needed *

1) 1 ft flash sync cord (to connect to pc adapter)
2) Hotshoe with pc input **
3) Electronic flash
4) Flash bracket

* get hotshoes and pc cables from FlashZebra.com
* *Hotshoe may not be necessary if your flash has a pc input

Cut the unused end of of the sync cord. Strip back the insulation. Peel back the wire braid and twirl into a wire. I apply solder to center wire and braid prior to soldering to flashcube contacts.

Scratch the flashcube contacts with a sharp object to clean off any crud or oxidation. Solder the braid of the sync cord to one contact. Solder the other wire to the other contact. You may melt a bit of the plastic around the flashcube contacts, that's why a pencil tip iron should be used.

I covered my soldering job with duct tape. Do not cover the center of the flashcube mount. The center piece must be free to operate.

You can test the flash operation without film installed as long as you have the batteries installed.

Here are a couple of images of the completed assembly.


Saturday, December 8, 2012

Working on a Darkroom

I am trying to make a darkroom. Right now I am interested in developing Liquid Light and Ilford Direct Positive Paper. Sometime later maybe I'll try black and white film.

I am setting up our laundry room. It has a sink and only one window and one door. I made a wooden frame that fits around the window. I stapled two sheets of 6 mil black plastic (from Lowes) over the frame. I drilled 1/8" holes midway on each side of the frame (left and right). These holes penetrate the window moulding as well. I insert a nail in each hole to hold the frame to the window. It seems to block the light quite nicely.

For the door I used 3/8" x 1/4" foam weatherstripping on the latch and hinge sides. This worked very well for me. For the large gap at the bottom I trimmed a piece of foam sold as "Window Air Conditioner Weatherstripping" such that I could stuff it under the door. It works well. You could just use a towel or duct tape.

I believe I have my darkroom dark enough. I am getting all the other stuff ready now. Pretty soon I'll give it a try.


Sunday, February 26, 2012

New, bigger and better UV Light Source for Cyanotypes and such

I had a UV source light source made from 2 UV bulbs and 6 inch reflectors. It worked ok but was cumbersome and not easily stored. I decided to make a larger unit, with four 14" tubes, and a timer. Here's a parts list of the electrical items:

From Bulbtronics:


 The first item are the T8 sockets, the second item is the T8 UV tubes, and the last item is a 4 Tube starter/ballast.

From Lowes I purchased a 120VAC 60 minute timer, and a metal box to put it in. I had an AC cord with 3 prong plug. The wood, glue, nails, and screws are also needed.

I began by building the box. Here's some images of the progress.


You can see I even covered the top with some decorative paper.  Also, note that I lined the area beneath the tubes with white poster board to reflect more of the light down.

The unit could be used as is, by propping it on books or whatever, so you could slide a negative and sensitized paper underneath. However, I think I will build a stand for it later.

Tuesday, August 9, 2011

UV lights for Exposing Cyanotypes

Setup for exposing for cyanotypes
Material:

2 UV fluorescent bulbs 15W ea
2 Lamp sockets with 6" reflectors
1 thin board or chip board

Sunday, August 9, 2009

DIY Camera Battery Charging Station


I have two Oly cameras and a dual battery grip for one. I have lots of batteries. I wanted to cleanup the battery charging situation and this charging station is the result. It has two Olympus chargers for the BM-1 batteries and one charger for CR-V3 LiOn batterries. I trimmed the power leads and then soldered them together to one plug. I made the power lead short, cause it sits on my workbench, but you could leave it long. I epoxied the chargers to the wood base. The wood base give the chargers some heft so they stay put. I find it works very well. The addition of a power switch would be nice.