I made a panoramic 6x17 120 film camera from black conservation board from Hobby Lobby. It uses a Fujinon 210 mm Lens/shutter. Here are some photos.
Mostly a photography related blog. Think About Photography refers to being ready for getting a photo at all times. This generally means carry your camera around with you as much as possible. Even without a camera, I am imagining how scenes would look in a photo..
Showing posts with label homemade. Show all posts
Sunday, November 23, 2014
Tuesday, November 18, 2014
Film Advance Details for Homemade Camera
Here are some details for the film advance for a 6x17 film camera I made. Thought this might give camera builders some ideas. Works pretty good for me.
The length of the tube can be determined from the rest of the camera design. The advance is pulled up by the knob to remove the roller. I use a bit of dowel for the bottom roller guide. Questions and comments are welcome.
Wednesday, September 10, 2014
My first attempt at encasing an insect in epoxy
I have long wanted to cast a insect in epoxy. When I found a good cicada specimen recently, I thought I would give it a go. This entry is about the mistakes I made. Hopefully, after reading, when you try you will avoid the same mistakes.
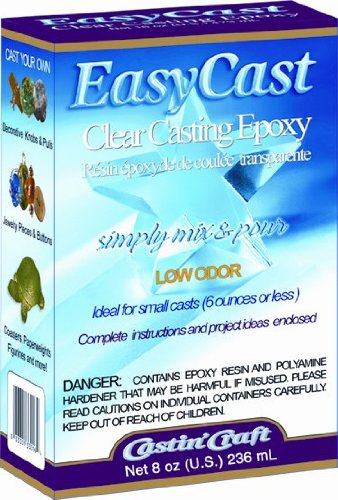
I used EasyCast clear casting resin from here.It is low odor and easy to work with.
I read the instructions (yes, I did) but continued to ignore them. The result was less than spectacular, but a learning experience.
Here is a list of my mistakes in hope that you will do better.
1) Used wrong kind of mold - Polypropylene or polyethylene resin mold are required. I am sure I used poly something, but it was too stiff and the epoxy bonded with it extremely well. I had to cut the piece out of the mold. USE THE RIGHT LIND OF MOLD.
2) Use a mold release - I skipped this as well - Instructions suggest using Castin'Craft Mold Release/Conditioner. USE MOLD RELEASE.
3) Bubbles - I had major bubble on head of the cicada. I believe it is suggested to coat the insect prior to placing in the mold of resin. You can coat the insect with using a small brush. WATCH FOR BUBBLES. COAT THE OBJECT.
4) The legs of my cicada protruded out of the resin. The cicada was very close to the edges. I should have used a bigger mold. USE THE CORRECT SIZE MOLD.
I have learned quite a bit. When the opportunity arises, I will try again. Hopefully without the issues described above.
I used EasyCast clear casting resin from here.It is low odor and easy to work with.
I read the instructions (yes, I did) but continued to ignore them. The result was less than spectacular, but a learning experience.
Here is a list of my mistakes in hope that you will do better.
1) Used wrong kind of mold - Polypropylene or polyethylene resin mold are required. I am sure I used poly something, but it was too stiff and the epoxy bonded with it extremely well. I had to cut the piece out of the mold. USE THE RIGHT LIND OF MOLD.
2) Use a mold release - I skipped this as well - Instructions suggest using Castin'Craft Mold Release/Conditioner. USE MOLD RELEASE.
3) Bubbles - I had major bubble on head of the cicada. I believe it is suggested to coat the insect prior to placing in the mold of resin. You can coat the insect with using a small brush. WATCH FOR BUBBLES. COAT THE OBJECT.
4) The legs of my cicada protruded out of the resin. The cicada was very close to the edges. I should have used a bigger mold. USE THE CORRECT SIZE MOLD.
I have learned quite a bit. When the opportunity arises, I will try again. Hopefully without the issues described above.
Thursday, April 4, 2013
8x10 Pinhole Camera
Here is my homemade 8x10 Pinhole camera. I started out modeling this after the "Hobo" 8x10 lens cameras sold by Bostick and Sullivan in the past. It ended up like you see it. Uses a 8x10 film holder. The film holder relies on friction fit right now. Will add some sort of clamp later.
Saturday, August 15, 2009
Home Made Flash Diffuser


This is probably not something you want to show up at a wedding shoot with, but it works great. I made this flash diffuser from a plastic storage tub. I cut a hole in the bottom to fit my Metz 48 flash. I used an exacto knife and razor blade to make the cutout. Be careful if you try it. I covered the opening with a double layer of wax paper. I attached the wax paper around the edges with hot glue. It has held up well, being bounced around home and in the car. I will post some comparison photos later on.
Subscribe to:
Posts (Atom)