Showing posts with label pinhole. Show all posts

Monday, October 17, 2022

3D Printed Pinhole Camera

 Here is version II of my 3d printed camera with the telephoto extension.


Here is the 50mm front piece. It uses a Skink pinhole.


Monday, September 8, 2014

Light Seal Material for pinhole camera

I used this felt which I found at Lowes for the light seal in my 4x5 pinhole camera. I found it in the furniture pad/floor protection area.


Wednesday, August 20, 2014

Polaroid Super Shooter to Pinhole Conversion


I converted a vintage Polaroid Super Shooter to a pinhole camera - giving me an instant pinhole camera. I mostly followed the steps in this video on youtube. There are 3 videos in this series. It is good background for making the pinhole camera.

I picked up a Super Shooter at a local fleamarket for $10. You want to be sure to get one with steel rollers and not the spreader thingy. Make sure the rollers are in good shape. It doesn't matter what shape the shutter/lenses/battery contacts are in - these are not used anyway.

The guy in the video trims down the camera to decrease the focal length. I did not.

I removed all the battery stuff. This exposed 3 screws which I removed allowing the front part of the camera including the shutter and lenses to come off. I also removed the flashbulb attachment. My camera didn't have a timer, but if yours does - decide whether or not to keep it or remove it.You can also remove the hinged film pack holder. After that you are ready to build the camera. I masked off the insides of my camera and painted the outside with spray paint made for plastic. I painted it a bright red. I like the look.

I made up the front piece of the camera and shutter from black Canson conservation board. This board is black all the way through and nice and stiff. I got a 16"x20" piece from Hobby Lobby. I purchased my pinhole assembly from fireseller66 on Ebay. I bought a 0.4mm Laser drilled pinhole. In hindsight, I wish I had got a smaller diameter - more on that later. This assembly has a small piece of copper with a pinhole glued onto a 19mm diameter washer. I cut a piece of board the size of the front of the camera and punched a 12.25mm hole in the center. I centered the pinhole assembly on this hole and glued with instant glue. Then, I layered another board on top with a 16mm hole. I glued this on with white PVA glue. I built up the shutter as in the video and attached with white PVA glue. Here is the end result.


I epoxied a 1/4"x20 threaded insert into the plastic box area that was the viewfinder. Again, this was similar to what the guy did on the video. I used the 6 min JB weld. Worked great.

The problem with such a large pinhole is that outside in sunshine a 3 sec exposure is all that is needed. It's nearly impossible to manipulate the shutter without moving the camera, so getting sharp images will not be easy. I am used to using photo paper in a pinhole camera and this paper is so slow that it is very forgiving for movement. I used 100 speed Fuji Instant B&W film which is no longer being produced. I started with 20 sec exposure which was washed out. Reduced to 10 secs and the image was better. Reduced to 5 secs and just about right. Somewhere between 3 and 5 sec exposure in sunlight gives the right exposure.

Here are some images made on the camera.


Thursday, April 11, 2013

New Filmholder Clamps for my 4x5 Pinhole Camera

I made new clamps to hold the filmholder in place on my 4x5 pinhole camera. I uses 1/8" luan strips. I secured one end with a screw and washer. I cut a notch in the other end which mates with some screws in the frame. Works pretty good but the notches may wear out sooner than later.


Thursday, April 4, 2013

8x10 Pinhole Camera

8x10 Pinhole Camera by HWPhillips
8x10 Pinhole Camera, a photo by HWPhillips on Flickr.
Here is my homemade 8x10 Pinhole camera. I started out modeling this after the "Hobo" 8x10 lens cameras sold by Bostick and Sullivan in the past. It ended up like you see it. Uses a 8x10 film holder. The film holder relies on friction fit right now. Will add some sort of clamp later.

Wednesday, February 13, 2013

Using Harman Direct Positive Paper - Trials and Tribulations

Harman (Ilford) makes a Direct Positive Paper (DPP) which can be used in place of film in a pinhole or medium format camera. It can also be exposed with an enlarger. Photograms are possible as well.I began my experiment by purchasing some 4x5 sheets fro my BandJ Orbit camera.I loaded the paper in a film-holder. I'm happy to say it fits the film-holder just fine. I loaded the paper in a darkroom with a red safety light.

I proceeded to take some shots outside in partly cloudy conditions. At f22 I used shutter speeds of 1 to 5 minutes. Why the long shutter speeds? Because somewhere and somehow I had confused myself into thinking they were required.

I developed the paper in Dektol paper developer and a fixer. On one or two of the images I could see a faint outline of trees. I had over exposed them all.

So, it's again a time for reflection and hoping I get it right next time.


Saturday, December 15, 2012

Homemade 4x5 Pinhole Camera

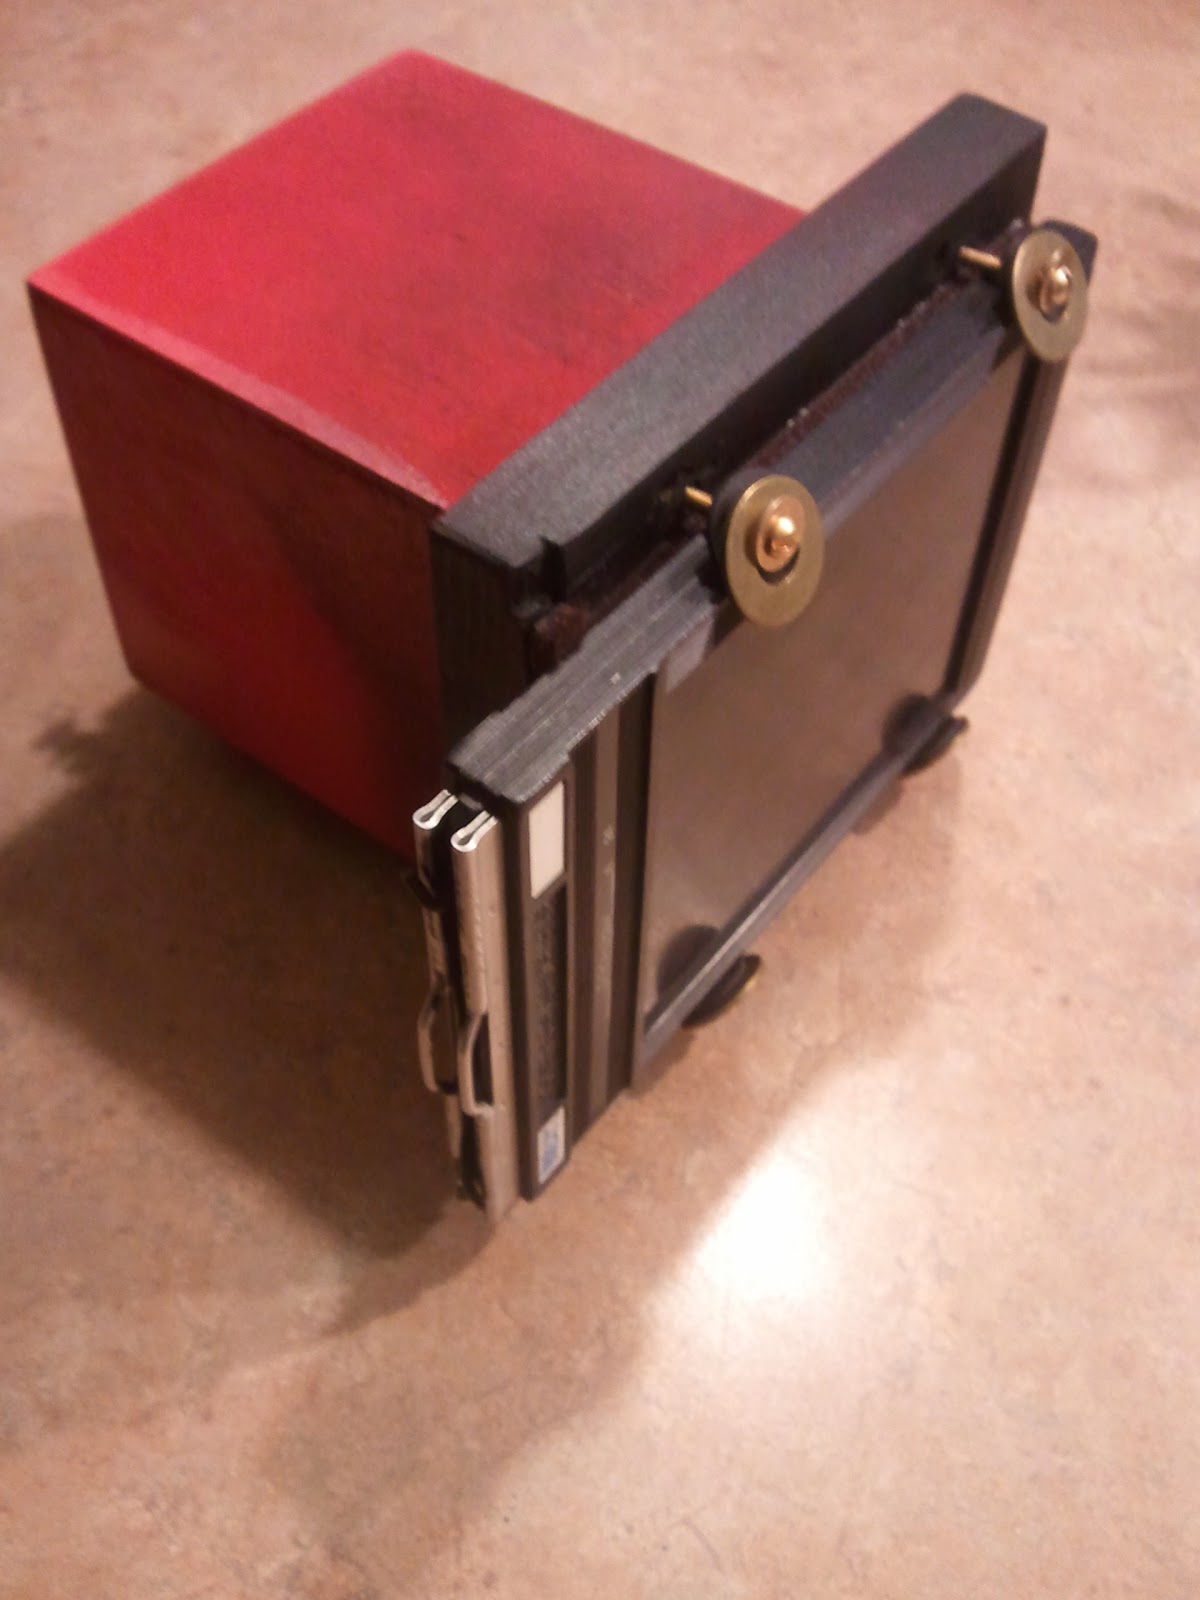
I had two main goals when making this pinhole camera: 1) Use a 4x5 film holder and 2) Use my Olympus fitting pinhole adapter. Here are the results.


I haven't used it yet. I plan on using lith film, photo emulsion, regular b&w film, or Ilford direct positive paper sometime soon.

The main box is a wooden box from Hobby Lobby. It was the largest of 3 nested boxes. I think it cost $5. I added the frame for the film holder. I used threaded inserts for the brass screws which hold the Film holder. I don't really like this and would change the design if I build another. I lined the opening with felt (for a light seal) On the bottom side I added a 1/4x20 threaded insert for mounting on a tripod.

The film holder dark slide will be the shutter. I'll post some imagess once I have some.

Update 11 March 2013: I found the screws to hold the film holder quite cumbersome for changing the holder. I decided to try velcro instead. This worked ok but I had movement when removing and inserting the dark slide. I added a stop (1/4" x 1/4") around the 3 sides of the holder. I attached the wooden stop with small brads and glue. Now the film holder is securely held in place and doesn't move when moving the dark slide.

I also had a light leak on the side of the film holder where the lip is. I had felt on the outside of the lip but not the inside. I added it to the inside as well. I really think that the inside felt is all that is needed. No light leaks now.