I've had my Burke and James Orbit for about a year now. No real way to store it, so it sits around in various places. I have looked at toolboxes as a possibility but with the awkward size of the camera I haven't found one that would work. Yesterday I was in Lowes and saw a canvas tool bag that would almost work. Today I went to Walmart and found a duffel bag with wheels that will work. Below are some pictures. I added some cardboard on each end to give it a little more protection. With the wheel assembly, the bottom is stiff and has good support for the camera. It does have lots of extra space for film holders and other stuff. For now, I am storing my homemade pinhole camera in it as well. This is not a solution for a professional who uses a camera like this day in and day out. Since I don't use my 4x5 that much - I think it will work well.
Mostly a photography related blog. Think About Photography refers to being ready for getting a photo at all times. This generally means carry your camera around with you as much as possible. Even without a camera, I am imagining how scenes would look in a photo..
Showing posts with label film holder. Show all posts
Saturday, April 27, 2013
Thursday, April 11, 2013
New Filmholder Clamps for my 4x5 Pinhole Camera
I made new clamps to hold the filmholder in place on my 4x5 pinhole
camera. I uses 1/8" luan strips. I secured one end with a screw and
washer. I cut a notch in the other end which mates with some screws in
the frame. Works pretty good but the notches may wear out sooner than
later.

Tuesday, February 12, 2013
Developing Ultrafine High Contrast Ortho Litho Sheet Film
I bought some Ultrafine High Contrast Ortho Litho film from Ultrafineonline.com. I am using this film as my introduction to film developing as it is cheap and can have very interesting results. I exposed the film in a 4x5 Orbit Monorail MF camera made by Burke and James. The first thing I noticed was that the film is 4x5 - not 3.9 x 4.9 - so it doesn't fit easily in the film holders for the camera. I was still able to load the film, but am not sure it was flat - but this was a learning process so I didn't worry too much about that.
I took a several shots with f15 and a shutter speed ranging from 1 min to 5 mins. It was a partly cloudy day and somewhere I had read that this was a good starting point.
I developed the film in Dektol paper developer and a fixer. I read where you can develop by sight. All of the negatives were black - which means they were over exposed.
I did a test where I developed a negative without exposing it and it turned out clear. I think this proved my darkroom was ok and the chemistry was fine. I realized later that I didn't dilute the Dektol. I took some more sample shots at a 3 min shutter and the negatives were still overexposed.
I am slow. Once I had in my mind I needed long exposures - I ignored the fact that I was getting overexposures.
I am going to take a break, regroup, do more study, and then try again and use a light meter to set up my camera.
Saturday, December 15, 2012
Homemade 4x5 Pinhole Camera
I had two main goals when making this pinhole camera: 1) Use a 4x5 film holder and 2) Use my Olympus fitting pinhole adapter. Here are the results.
I haven't used it yet. I plan on using lith film, photo emulsion, regular b&w film, or Ilford direct positive paper sometime soon.
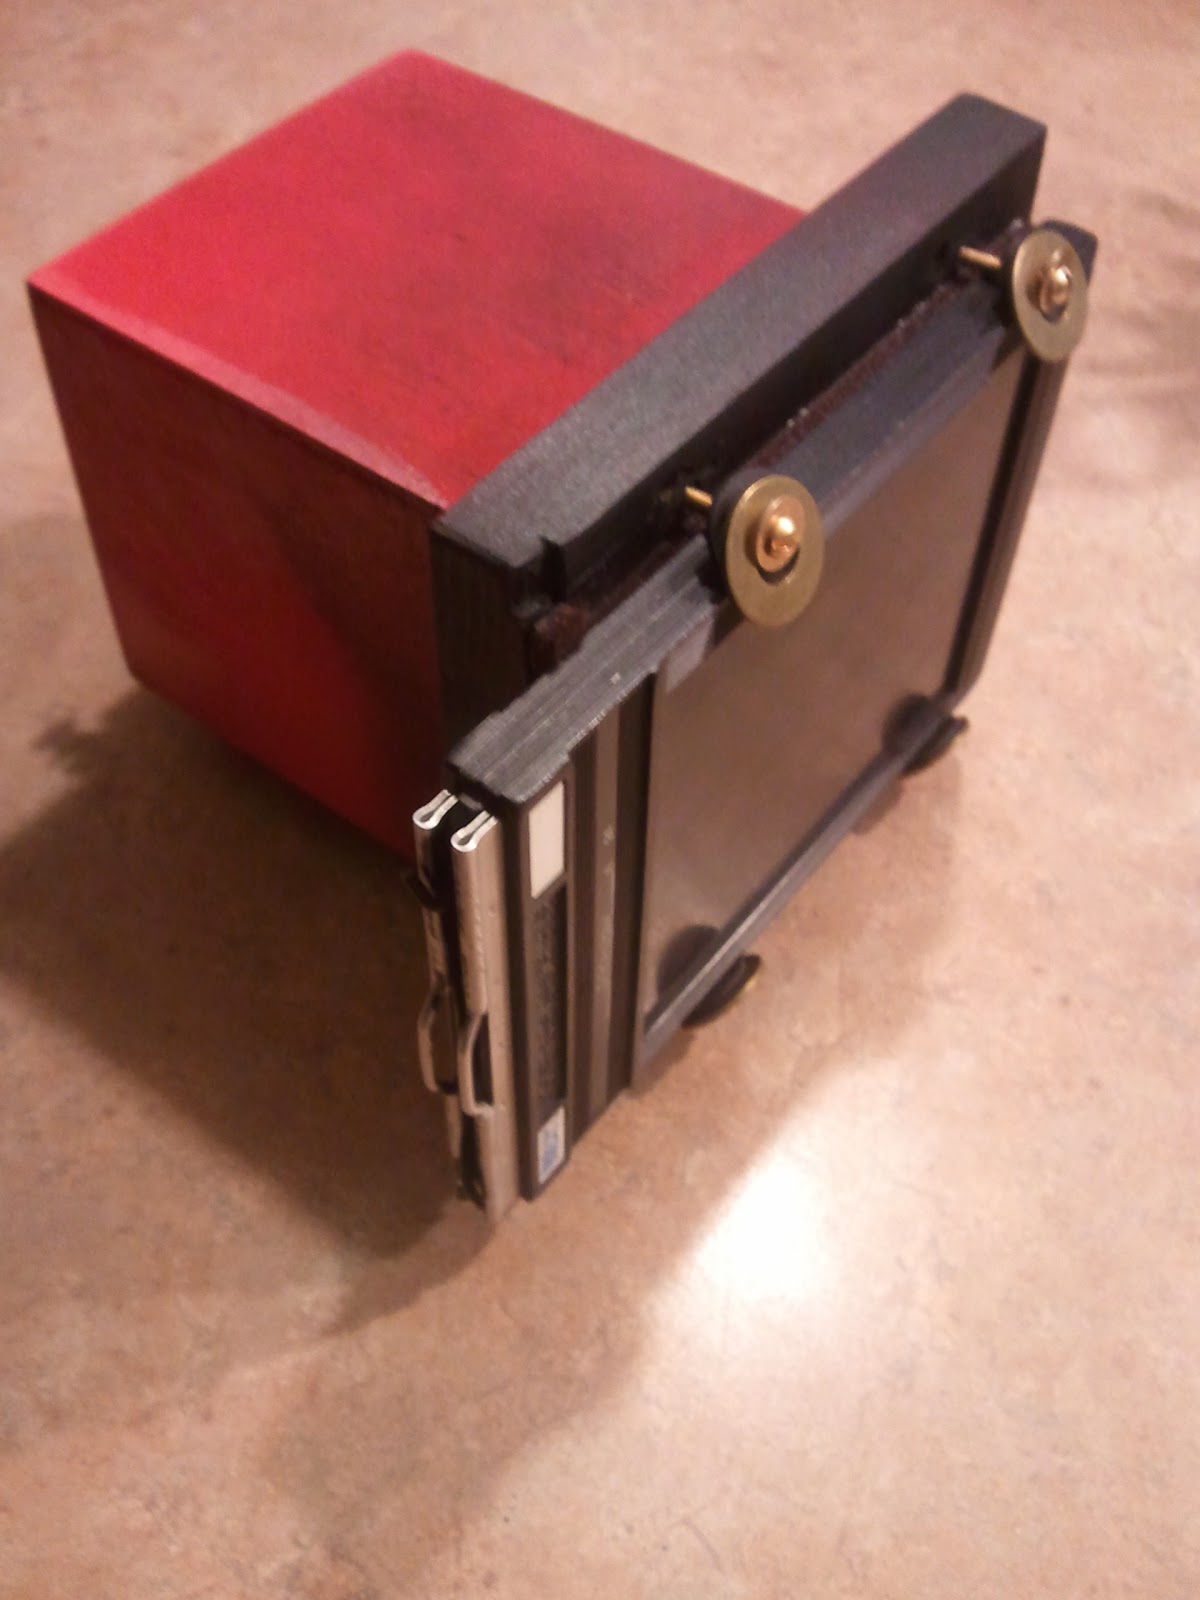
The main box is a wooden box from Hobby Lobby. It was the largest of 3 nested boxes. I think it cost $5. I added the frame for the film holder. I used threaded inserts for the brass screws which hold the Film holder. I don't really like this and would change the design if I build another. I lined the opening with felt (for a light seal) On the bottom side I added a 1/4x20 threaded insert for mounting on a tripod.
The film holder dark slide will be the shutter. I'll post some imagess once I have some.
Update 11 March 2013: I found the screws to hold the film holder quite cumbersome for changing the holder. I decided to try velcro instead. This worked ok but I had movement when removing and inserting the dark slide. I added a stop (1/4" x 1/4") around the 3 sides of the holder. I attached the wooden stop with small brads and glue. Now the film holder is securely held in place and doesn't move when moving the dark slide.
I also had a light leak on the side of the film holder where the lip is. I had felt on the outside of the lip but not the inside. I added it to the inside as well. I really think that the inside felt is all that is needed. No light leaks now.
Subscribe to:
Posts (Atom)